Search for answers or browse our knowledge base.
Empowering Systems “Dashboard”
Purpose:
This document explains the uses and options of the “Empowering Systems Dashboard” (ESI Dashboard) screen.
Prerequisites:
AccountManager 5.0 or greater
Background:
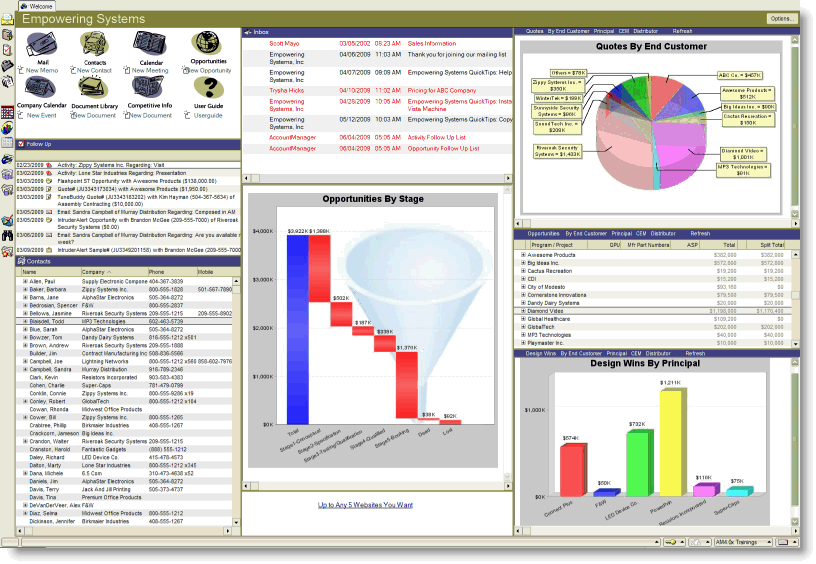
The Dashboard screen is an optional page that can be used as a Home Page (or “start page”) in IBM Notes. It can be customized to show a variety of information depending upon your company’s configuration.
Example of an ESI Dashboard:
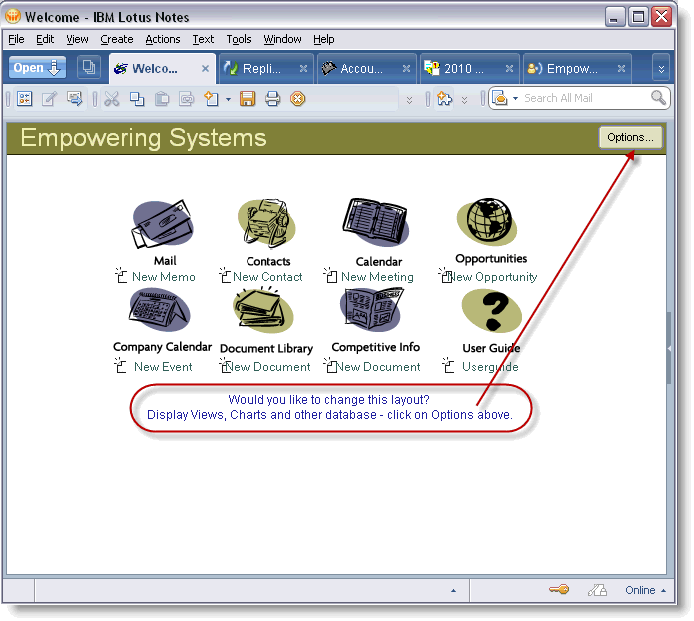
When you first install IBM Notes and Accountmanager, your Dashboard screen will look more like this (note the information that tells you about customizing that screen!):
Additional information on the following topics can be found below:
Section A. Setting the ESI Dashboard as your Home Page
Section B. Customizing the ESI Dashboard
Section A. Setting the ESI Dashboard as your Home Page
Because of it’s customizable interface, many users prefer using the ESI Dashboard screen as their Home Page (meaning it’s the first screen they see after logging into IBM Notes). If you currently have something else as your home page and would like to use the ESI Dashboard instead, follow the steps below:
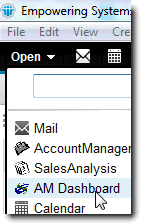
1. Find the icon for the Dashboard by clicking your “Open” button in the upper left corner of the Notes client. The icon should look like the Empowering Systems logo (an “E” and an “S” overlaid on one another).
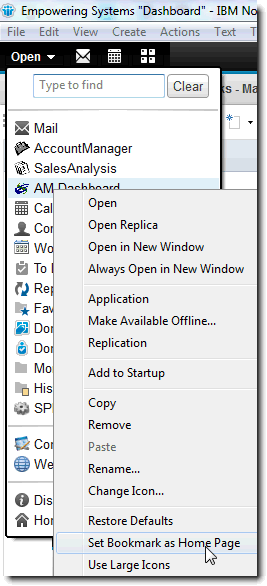
2. Right-click the icon and select “Set bookmark as Home Page”
3. Click “Yes” to the prompt about replacing your current home page with the Dashboard, and you’re all set! The Dashboard will now be the first screen that displays after you log into Notes each day.
Section B. Customizing the ESI Dashboard
You can customize your Dashboard in many ways. Your choices, and the choices of your coworkers have no bearing on one another, as each person’s Dashboard is configured for themselves only. (Note: Depending up on your company’s licenses and configuration, some options may not be available to you. Contact your administrator with any questions):
1. Open the Dashboard screen if it’s not already your home page. Click the “Options” button in the upper right corner.
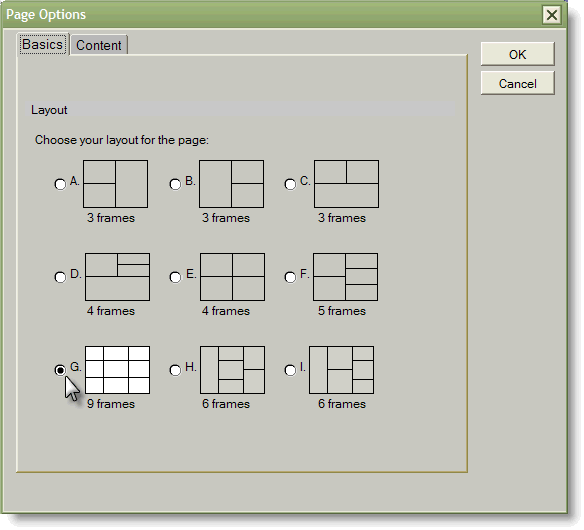
2. On the “Basics” tab, choose the layout you like the best. Note that the lower choices (with more than 5 frames) are best suited for higher resolution screens and monitors. Click “OK”

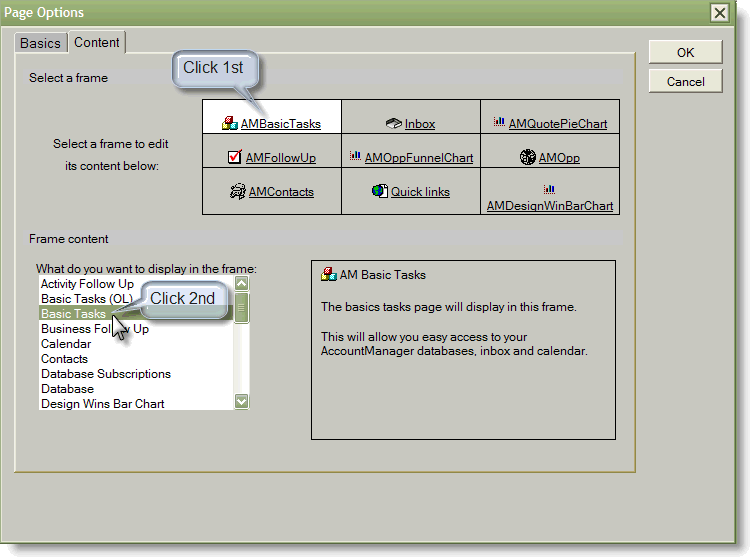
3. On the “Content” tab, populate the various panes with the desired content. To make a selection, first click the pane you want to configure in the diagram on top. Then select the content from the list below. We recommend keeping one of the panes as “AM Basic Tasks” as this is your shortcut to other areas of the software.
4. After you’ve made selections for each “pane”, click the “OK” button and your new Dashboard will populate the screen. You can play around with sliding the dividers between the panes up, down, left and right to adjust the display, and those adjustments will be “remembered” next time you log in. Also note that certain choices, like charts, allow you to adjust the size while still in the Content tab of the Page Options screen. You may need to adjust this a couple of times before you find a size that fits right.
Additional Notes:
“Inbox” and “Calendar” options are only available to users with IBM Notes as their default email client. It is not currently possible to configure an Outlook inbox or calendar to display within the ESI Dashboard.
Certain pane choices like Opportunity View, charts etc. have options within the title bars once set. Displayed data can be manipulated by choosing different options. For example, opportunities could be viewed “By Principal”, “By Distributor” etc.
