Search for answers or browse our knowledge base.
CRM Dashboard: Profile & Layout Setup
Purpose: This document explains how to configure and set up the Principal CRM Dashboard feature in AccountManager Web.
Background: The CRM Dashboard helps representatives streamline opportunity updates in their principals’ CRM systems. CRM Dashboard tracks and highlights your entire team’s updates to your AccountManager (AM) Opportunities, so that one person can easily transfer them to the principal’s external system. As a rep firm owner/manager, if your field salespeople are currently doing double entry into both your AccountManager and your principal’s CRM, that’s time taken away from selling. Worse, if they’re skipping entering the data into AccountManager entirely (since they have to put it in the principal’s system), your company’s best data is not actually contained in one place. (Isn’t that one of the reasons you got a CRM system in the first place?)
Prerequisites: Contact ESI Support to let us know which user(s) will need access to the CRM Dashboard. These users should also have access to “all data” in AM, regardless of account assignments. Typically, this is one or two inside sales or office administrator type of users.
Creating Principal CRM Profiles (Initial Setup. This is done only once, when first setting up this principal on the CRM Dashboard):
- Log-in to AccountManager Web and go to the Accounts view.
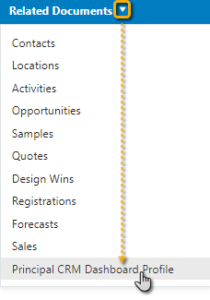
- Open a Principal Account Profile for whom you’ll be using the CRM Dashboard, then go to Related Docs > Principal CRM Dashboard Profile.
- The fields on this screen are optional, unless your company will be using our PartnerConnect feature (not applicable to the content in this document). Click the Save button.
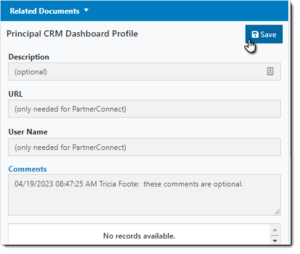
- Now, a “New CRM Layout” button should be visible under the Comments area. Click this button.

- Set up the CRM Layout.
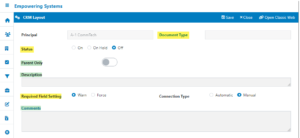
- On this screen, the fields highlighted yellow below are required.
- Document Type: Choose Opportunity.
- Status: Leave as “Off” while editing the Layout. (You can switch it to “On” once you’re done, which enables it for use within AccountManager).
- Required Field Setting: Choose which requirement level you want to use for this principal. This only applies to the fields you specify as Required. Both settings notify the user, when saving an Opportunity Profile, that a required field is missing information. The message will specify which field it is. Multiple required (but empty) fields will create sequential popups for each one.
- Warn: the user can click OK to the warning, but still save the opportunity anyway, even with the field left empty.
- Force: the user cannot save the opportunity without putting information in the required fields
- Fields highlighted green in the above screenshot are optional.
- Parent Only: Enable this if you want to track opportunities for the parent account of the principal only, and not Locations of the principal.
- Description: You can enter some kind of description here, which can be helpful if multiple profiles are created for the same principal (i.e. if they have more than one division for which you’re updating opportunities).
- Comments: Any additional comments you may want to make can go here.
- On this screen, the fields highlighted yellow below are required.
Creating CRM Layouts:
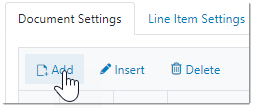
The CRM Layout is where you’ll specify the actual fields that you need to track, that correspond to your Principal’s CRM system. It may be helpful to have an Opportunity screen open in your principal’s system in another window, so that you can set these fields up in a similar order to how they appear there. Most of the fields you’ll need will be on the Document Settings tab, but for information that’s only found on Line Items (Mfr Part Nr, Price, Qty/Unit, etc), you’ll use the Line Item Settings tab.
For each field you want to add, do the following:
- Click the Add button, then in the pop-up, click the Field hyperlink.
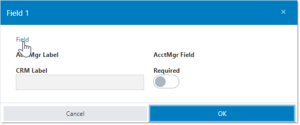
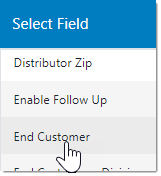
- Scroll through the list of fields, select one and click OK.
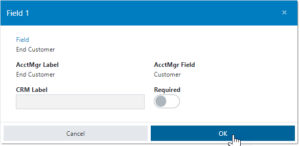
- The two “AcctMgr” fields will populate automatically. The CRM Label and Required slider are optional. Click OK.
- CRM Label: You can type in what the corresponding field is called in the Principal’s system, if you’d like to, but this is not necessary.
- Required: Enabling this will prompt users if they have left this field empty, when they try to save the opportunity. This corresponds to the “Warn” vs. “Force” option you selected in the header of the layout.
- The two “AcctMgr” fields will populate automatically. The CRM Label and Required slider are optional. Click OK.
- Continue the above steps through the Document and Line Item Settings tabs, until you have set up all the fields you need to track for updates in your principal’s system.
- When finished, click the “Save” button in the top right corner of the Layout screen.
That’s it! Your layout is now ready to use. At this time, you can enable it, by setting the Status field to “On” (which means “Required” fields will begin taking effect).